
How to Paint a Room: Complete Step-by-Step DIY Guide
How to Paint a Room: The Step-by-Step DIY Guide for a Professional Finish
Few home projects deliver as dramatic a transformation as painting a room. Whether refreshing rental walls, personalizing an apartment, or modernizing a bedroom, a fresh coat of paint redefines your space. However, beginners often battle common pitfalls: roller streaks, drips, jagged borders, or damaged baseboards.
Professional painters rely on a proven principle: painting is 70% preparation and 30% application. By prepping surfaces thoroughly, choosing the right tools, and using proper cutting-in and rolling techniques, you can achieve crisp lines and smooth, uniform coverage in a single weekend. Here is your complete step-by-step guide to painting a room like a pro.
Step 1: Planning, Calculating Paint, and Assembling Supplies
Before purchasing supplies, confirm your permissions. If renting, review your lease agreement first. As detailed in our guide on Should You Paint Your Apartment? A Guide to Refreshing Your Space, securing written approval via email protects your security deposit and clarifies whether walls must return to neutral white at move-out.
How Much Paint Do You Need?
One gallon of interior acrylic latex paint covers approximately 350 to 400 square feet with one coat. To calculate your room’s requirements:
Measure perimeter: Add all wall lengths together (e.g., 10 ft + 12 ft + 10 ft + 12 ft = 44 ft).
Multiply by ceiling height: 44 ft × 8 ft = 352 sq ft total wall area.
Deduct doors and windows: Subtract 20 sq ft per standard door and 15 sq ft per window.
Double for two coats: Professional coverage always requires two coats. A typical 10×12 bedroom requires roughly 2 gallons.
Essential Supplies Checklist
| Tool | Recommended Spec | Key Purpose |
|---|---|---|
| Angled Sash Brush | 2.5-inch synthetic bristle | Precision cutting-in along ceilings, trim, and corners |
| Paint Roller & Frame | 9-inch roller with 3/8-inch nap | Uniform paint distribution on smooth drywall |
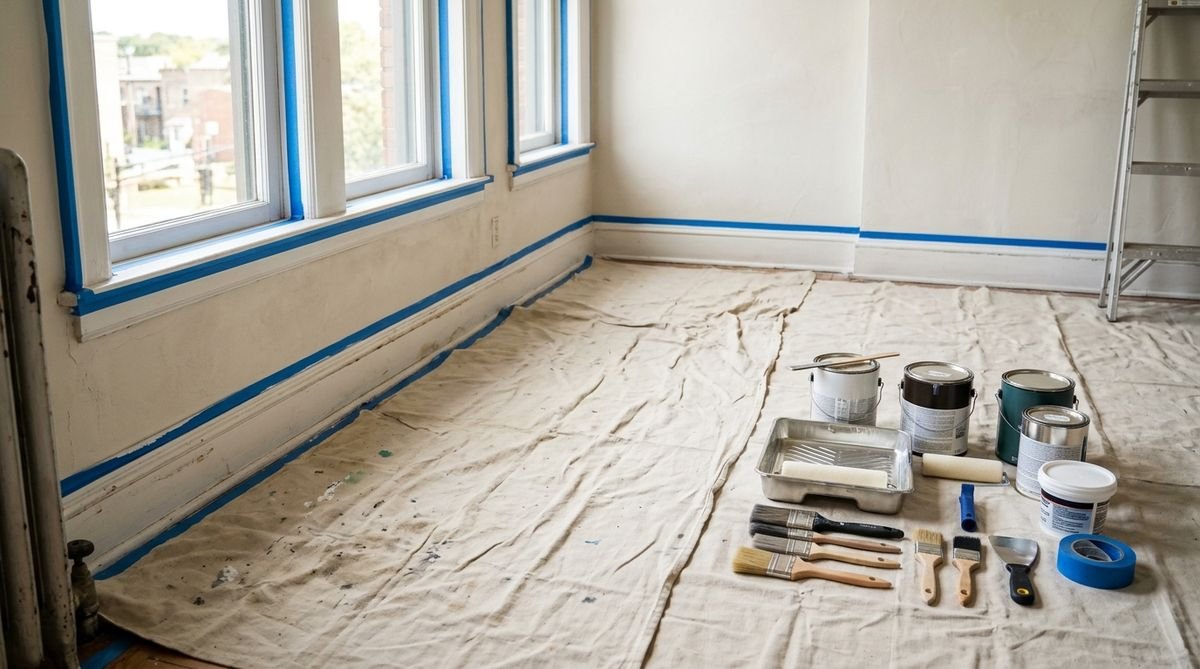
| Drop Cloths | Heavyweight canvas | Absorbs drips and stays securely in place underfoot |
| Painter’s Tape | Premium blue or green painter’s tape | Creates clean edge lines and prevents paint bleed |
| Wall Repair Kit | Lightweight spackle & 180-grit sanding pad | Patches nail holes, small cracks, and drywall dings |
| Paint Finish | Eggshell or Satin sheen | Durable, easy to clean, and hides surface imperfections |
Step 2: Clearing the Space and Prepping the Walls
Clear the room to create working clearance. Move lightweight furniture and rugs into an adjacent area. Shift large items to the center of the room and cover them securely with plastic sheeting. Unscrew and remove all outlet covers and switch plates rather than taping around them for a much cleaner finish.
Wash and Patch the Drywall
Paint needs a clean, dust-free surface to bond properly. Wipe walls using a sponge dampened with warm water and mild dish soap to remove grease and dust, then let them dry. Next, patch nail holes using lightweight spackle. Press the compound into voids with a putty knife held at a 45-degree angle. Once dry (about 1 to 2 hours), sand flush using 180-grit sandpaper and wipe away residual dust.
Step 3: Taping Trim and Deciding on Primer
Apply painter’s tape along the top edge of baseboards, window casings, and door trim in manageable 2-foot strips to maintain straight alignment.
Pro Edge-Sealing Tip: After placing painter’s tape, firmly rub the edge with a plastic putty knife or clean credit card. This burnishes the tape adhesive to prevent paint from bleeding beneath.
While modern quality paints often feature built-in primer, apply a dedicated stain-blocking primer if covering dark walls with light shades, painting over bare drywall patches, or treating water and smoke stains.
Step 4: Master the Cut-In Technique
Always paint from top to bottom. If painting ceilings, finish them before tackling walls. Next, “cut in” perimeters where rollers cannot reach: corners, ceiling borders, baseboards, and door casings.

Pour 2 cups of paint into a cut-in bucket. Dip your 2.5-inch angled sash brush one-third deep, tapping excess paint against the inside rim. Hold the brush like a pencil, drawing steady strokes 1/8 inch from your tape line as bristles fan out to meet the edge. Work in 3-foot sections to keep edges wet.
Step 5: Rolling the Walls Like a Pro (The “W” Pattern)
Pour paint into your tray liner until the reservoir is half full. Saturate the roller sleeve evenly by rolling it across the tray ramp without overloading it.
Roll a “W” Shape: Start in an upper corner and paint a 3-foot by 3-foot “W” pattern onto the drywall without lifting the roller.
Fill In the Field: Move the roller up and down across the “W” to distribute paint across the section.
Finish with Downward Passes: Lightly pull the roller from ceiling to baseboard in one continuous downward stroke to smooth texture.
Maintain a Wet Edge: Overlap each neighboring section by 20% to avoid visible lap marks.
Step 6: Drying Times, Second Coats, and Clean Removal
Latex paint dries to the touch in 1 hour, but you must wait 2 to 4 hours before applying a second coat. Applying paint over damp coats causes dragging and uneven sheen.

Removing Painter’s Tape Cleanly
Pull painter’s tape when the final coat is slightly tacky, or after it has dried completely. Pull the tape backward slowly at a 45-degree angle. If paint bridges over the tape edge, score the seam gently with a sharp utility knife to avoid peeling.
Allow walls to cure for 48 to 72 hours before hanging art. For renters, check our practical guide on How to Master Apartment Wall Decor Without Losing Your Security Deposit for damage-free hanging ideas.
Quick Reference: Common Painting Mistakes to Avoid
Skipping Wall Cleaning: Dust and oils cause paint to bubble and blister over time.
Using Flimsy Plastic Tarps: Thin plastic tears easily and creates slippery hazards; use heavy canvas drop cloths instead.
Over-Pressing the Roller: Pushing too hard creates raised ridges of paint along the roller edges.
Stopping Mid-Wall: Never stop painting in the middle of a wall. Always finish an entire surface to prevent visible seam lines.
Frequently Asked Questions
How long does it take to paint an average room?
A standard 10×12 room takes roughly 4 to 6 hours of hands-on labor: 2 hours for room prep, patching, and taping, 1 hour for the initial coat, 2 to 4 hours of drying time, and 1 hour for the second coat and cleanup.
What paint sheen is best for bedrooms and living rooms?
Eggshell is ideal for bedrooms and living rooms. It provides an elegant, low-glare finish that conceals wall flaws while remaining wipeable. For humid bathrooms, choose satin; for baseboards, use semi-gloss.
How do I minimize paint odors in an apartment?
Choose Zero-VOC or Low-VOC latex paint. Place a box fan facing outward in an open window to vent airborne fumes while keeping interior doors open to maintain cross-ventilation.